Invite Readers to Follow You & Your Blog 

How I Arrived at WordPress.com

Joining the WordPress community in April 2014 was one of the best choices I’ve ever made. Although I should preface that with the fact that I didn’t immediately pick up on what many of those advantages actually were. My joining the WordPress.com community occurred at a time when I was engulfed in a curious kind of tunnel vision. That vision instilled in me the uncanny sense that I was somewhat like America’s early settlers…like those who picked up, left everything behind and moved Westward.

I know that this sounds kind of weird…but I was striking out in my own for the first time, so, like the early pioneers, I imagined myself to be a trailblazer. The only difference was that nothing I was doing was remotely unique or groundbreaking. But for reasons I can’t really put words to yet, that’s exactly how I felt.

My PC's Standing up Monitor

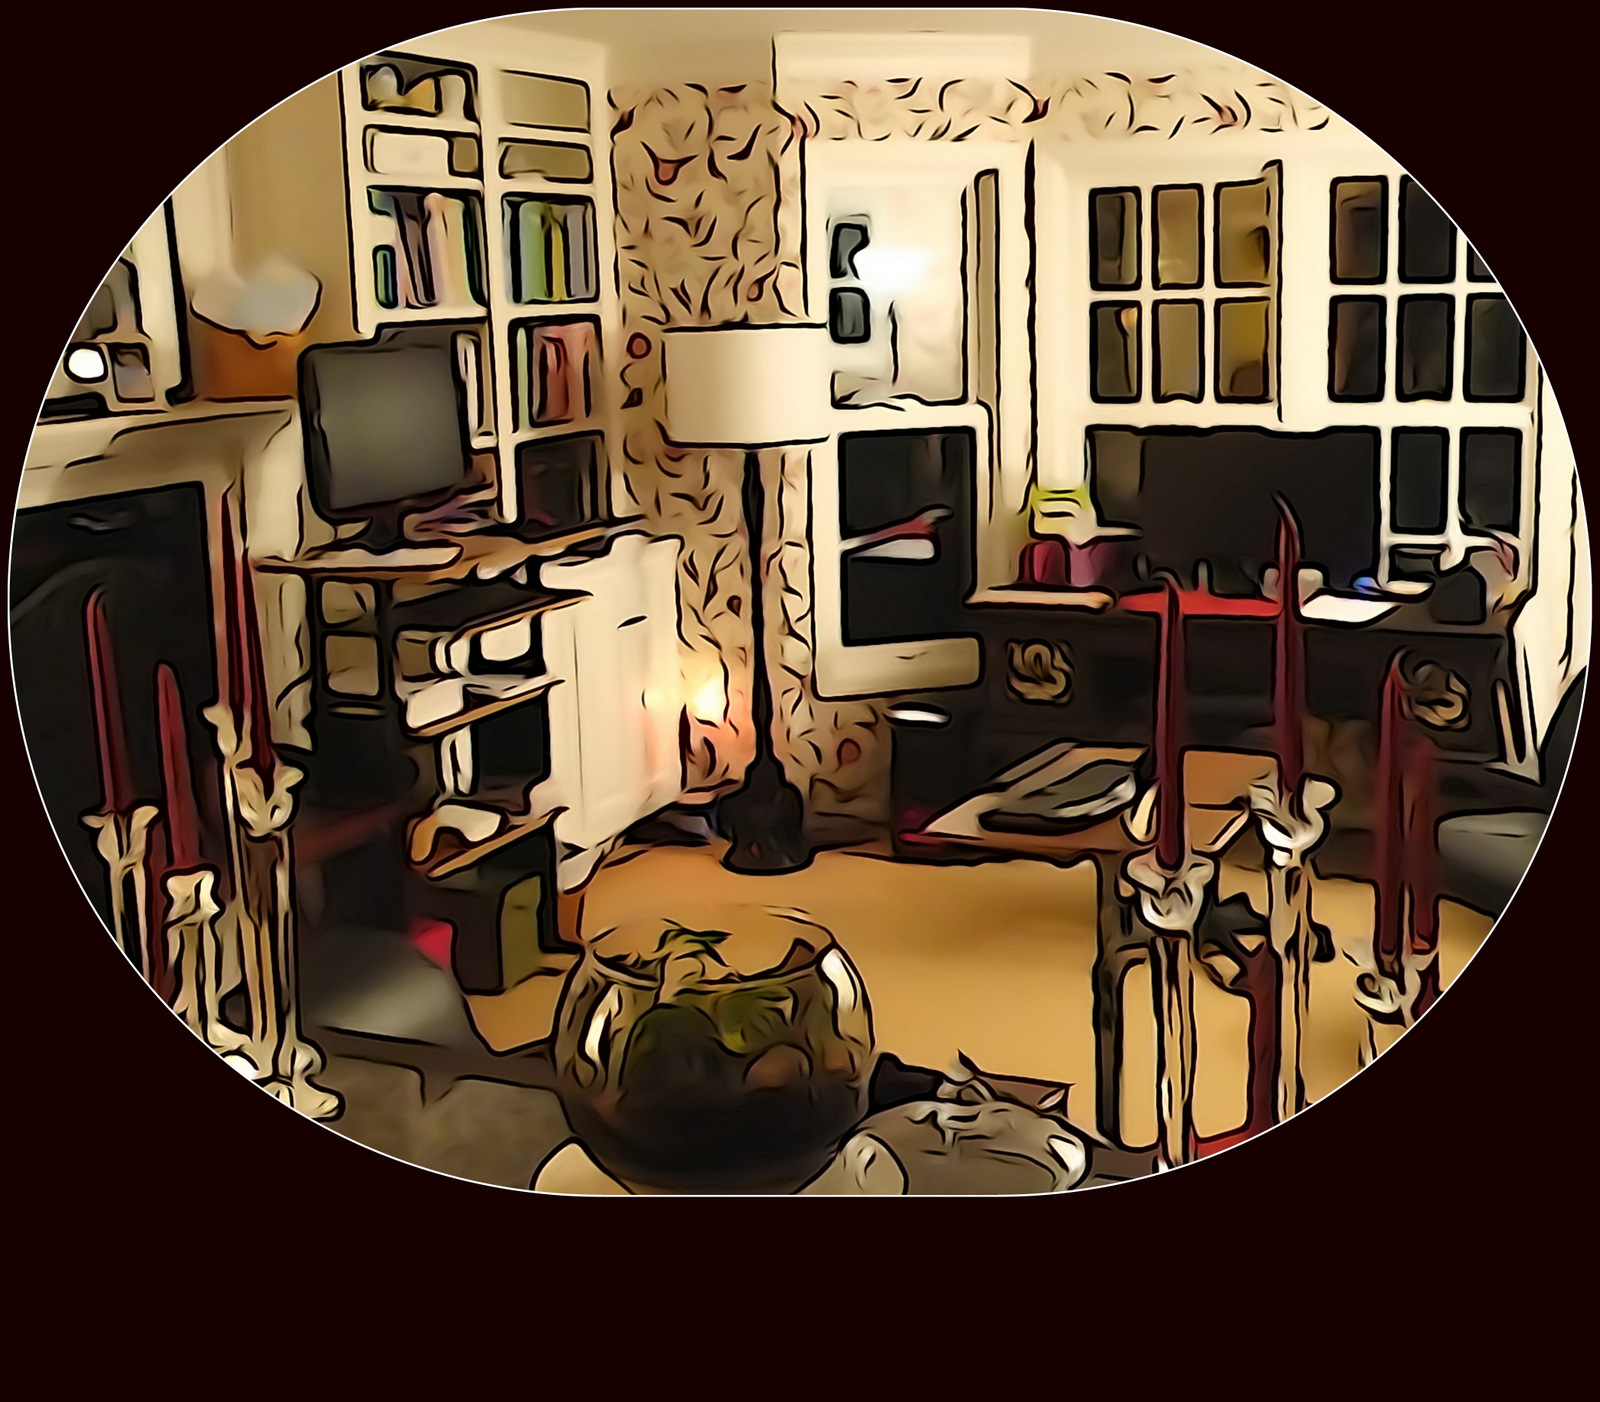
I began using this standing desk right around the time I joined WordPress

I was so intent upon the ‘striking out my own with my very own website’ part that I completely failed to recognize WordPress.com’s social and community aspects. You can read more about my journey leading up to joining WordPress.com here. 

Maybe it’s because I was leaving a platform which was known for its strong community element. Or maybe it was because I didn’t yet really understand the broad range of characteristics that have come to define what a blog is today. I had never really considered blogs to be much more than personal journals…which was something I had no interest in. Nor could I imagine a set of circumstances under which that opinion would waver. Mine was to be a website filled with helpful information…not a journal of my hopes and dreams, or feelings and opinions, or even one in which I shared my artistic talents and growth to a larger audience.

vsatips was to be a website filled with information which solved problems and improved people’s productivity, and which sometimes shared exciting technology news too.

The excitement inherent to early exploration was my motivating force then and it continues to be now. What more can I say about that other than that my family always considered me to be kind of odd…I was most definitely and always, the ‘odd man out’ in that dynamic.

My Early Days at WordPress

Why Am I Beginning With My Beginnings at WordPress?

The answer to that question feels eminently important to me…important  for my readers to understand…hopefully my gut is right about this!

I was so excited to finally be in control of my destiny, so to speak, that I missed out on a lot of the very cool features of WordPress.com. I instantly leapt into and became completely immersed in building my site and writing what I believed to be good content, in the hopes that I’d grow a solid readership base of like-minded individuals. Beyond that, my thinking never really ventured. I mean, I never really figured out the ‘why’ behind my goal and what about my goal was so important to me.

The above is what I see at the end of one of my posts.

My Blog Today

Truthfully I still haven’t put a ton of thought into that aspect. I’m still really just focused on the goal…not so much on the ‘why’s’ of it. But, upon reflection, I do think I’ve figured that part out a little bit more.

I realize that amongst my friends and family I’m unique in my interests. No one else even remotely shares my passion for mobile technology simply for technologies sake…if that makes sense. I’m just thrilled and fascinated that we can do everything we can with all kinds of technology today…but especially with mobile technology.

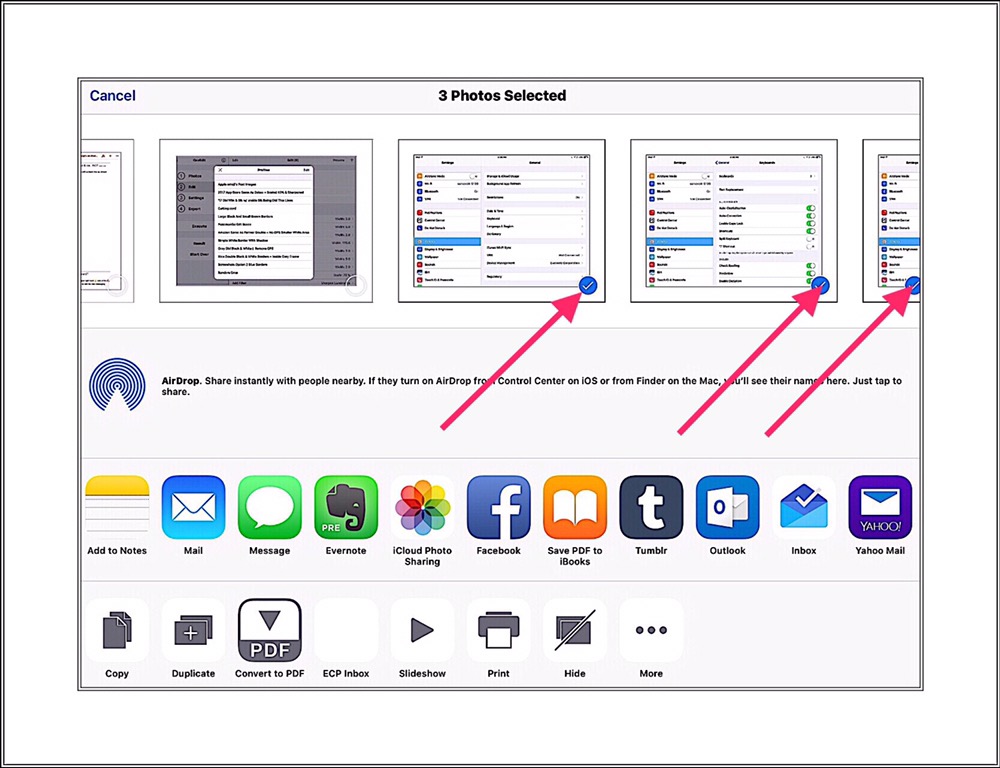
The thought that I can carry around all the information that’s important to me in the whole wide world in one relatively tiny device, my cellphone, simply through the use of a few free apps…most notably iCloud Photos and Evernote…astonishes me! It’s just too cool for words imho!

Using that as a vantage point, hopefully makes it easy to see why my endeavors to make sure that all of this miraculous ingenuity continues to work, seems to me to be, if not an admirable occupation, at the very least a worthwhile one. Being able to share that love with other like-minded people just seems to me to be a natural extension of all that.

Growing a Following on WordPress

That’s one big reason why I continue to work at this almost 24-7. Another reason is because I’m determined to figure out a way to actually make a living doing what I love. While my 2nd goal may still seem to be somewhat intangible right now (or a pipe dream…where does that phrase originate from anyway?)…I’m a believer regardless. I truly believe that if I keep working at it, and keep loving it…only good things will follow…I mean, how can they not?

That’s why I’m so excited to have over 1100 followers in about 2 1/2 years time. Even though most of them are really just my Twitter followers :-)

It’s also why I get super excited when I look at my WordPress Stats and see a large jump in my overall numbers periodically.

My Stats history looks something like this: 

  • mid-2014 when I began       NO DAILY VIEWS
  • Last 6 months of 2014          6 VIEWS PER DAY
  • 1st half of 2015                       12.5 VIEWS PER DAY
  • 2nd half of 2015                     20 VIEWS PER DAY
  • 1st half of 2016                       35 VIEWS PER DAY
  • 3rd Qtr of 2016                       60 VIEWS PER DAY
  • 4th Qtr of 2016                       100 VIEWS PER DAY
  • 1st Qtr of 2017  (so far)         133 VIEWS PER DAY

Interpreting My Stats Importance

I’m not entirely certain why my Stats periodically make these big leaps in numbers of overall viewers. I’m sure it has something to do with how active I am posting new material…I’ve noticed consistent correlations there…although my most recent jumps don’t bear out that supposition. Hopefully, the longer I do this the reasons behind the numbers will start to become more obvious to me.

Because for me, I really believe that these ‘Views’ Stats are the most important factor I have in benchmarking or assessing my primary goal’s success.

Growing my Follower Base

My Early Approach

The main reason I believe my Stats are where I should place my main focus is because roughly 95% of my viewers arrive at my site organically. That’s a cool trendy  word right now that essentially means ‘naturally.’ People arrive at vsatips because they used Google to search for a specific topic that I’ve written about.

It makes complete sense to me that the organic nature of my readership places less emphasis on the ‘follower’ statistic and more on the ‘# of Views’ statistic. Also, it makes sense because most of the topics I write about were the direct result of my own encounter with a problem that I couldn’t find a good answer for when I searched using Google. If I figure out a solution to some problem, my assumption is that other people will encounter that same problem and will use Google for finding an answer.

That also explains why my follower statistics, in the traditional sense, don’t seem to be really relevant for my sites overall success. But too I recognize that my thinking may be short-sighted. That’s what happens in a ‘tunnel vision’ scenario!

Coming  Around to a New & Better Way of Thinking

That’s not too say that I’ve completely ignored my ‘followers’ statistics. I just haven’t really focused on them much. One big reason is because of a mistaken assumption I’ve held onto since the first day I began vsatips.

One Mistake I Made in Understanding Who Could Follow My Blog

I mistakenly believed that regular, everyday people couldn’t follow my blogs by using the email subscription option. I thought that WordPress required a person to have a WordPress account in order to be able to ‘follow’ other WordPress author’s sites. How did I arrive at this erroneous assumption you’re wondering? Shortly after I began my blog my son wanted to follow me in a noble gesture of support. In order to do so, he told me had to join WordPress. I was puzzled by that and so I explored it a little on my own. That was the conclusion I came to as well.

Imagine my surprise when I discovered today that was not correct at all. This happened as I was I researching this topic again for a post I’m writing. But I approached the whole subject from a slightly different angle, and I learned that there really aren’t any restrictions for who can follow a blog. The follow mechanism, which is really just an email subscription readers can sign up for, means that they receive periodic emails based upon their chosen frequency, alerting them to any new content you’ve written.

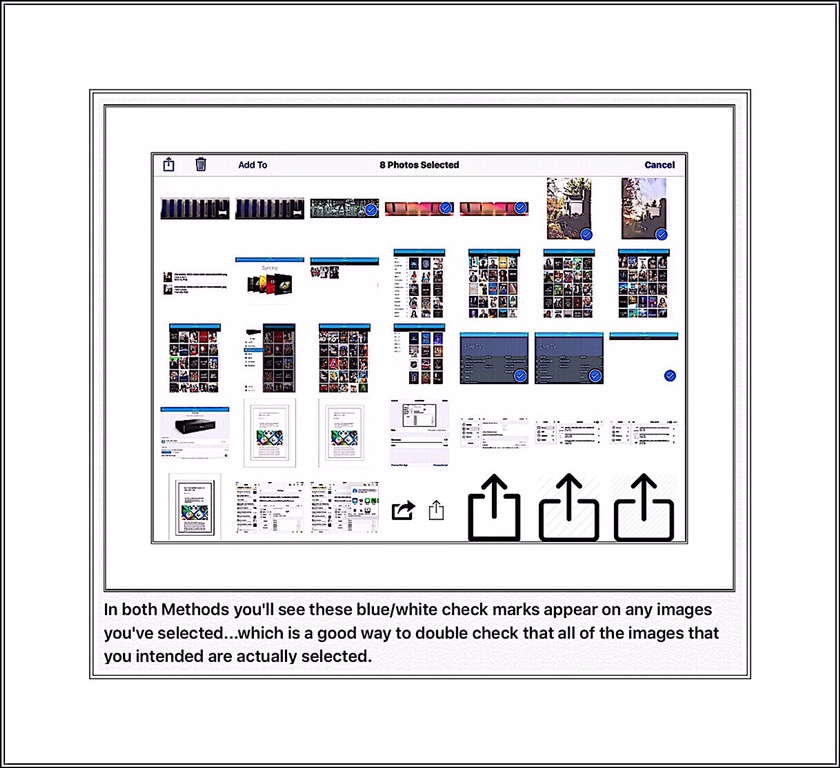
Anyone Can Follow Your Blog…All They Need is an Email Address!

I read quite a few different WordPress support articles on the subject today. In none of them was it evident to me that the instructions applied equally to those people with and without WordPress accounts. I’m still a little shaken to think that I held such an erroneous assumption for so long! I’m a bit curious too to know if I’m alone in my misunderstanding.

Even more puzzling is the fact that I actually mentioned this whole topic in another post I wrote about the WordPress Reader. And at that time I discussed using a Follow widget for nonWordpress people to use of they wanted to follow your blog. So apparently I wasn’t always unclear about this…I seemed to know at that time that it was possible for bloggers in WordPress.com to have nonWordPress followers. Which actually just confuses me a little more. Why was I so surprised when I discovered this ‘not new’ information today and why did I hold my mistaken assumption for so long? Is it because of the way things are worded in the built-in following mechanism that WordPress provides to us? Do the support articles use ambiguous wording? Or did I just misread them?  I’d really love to know.

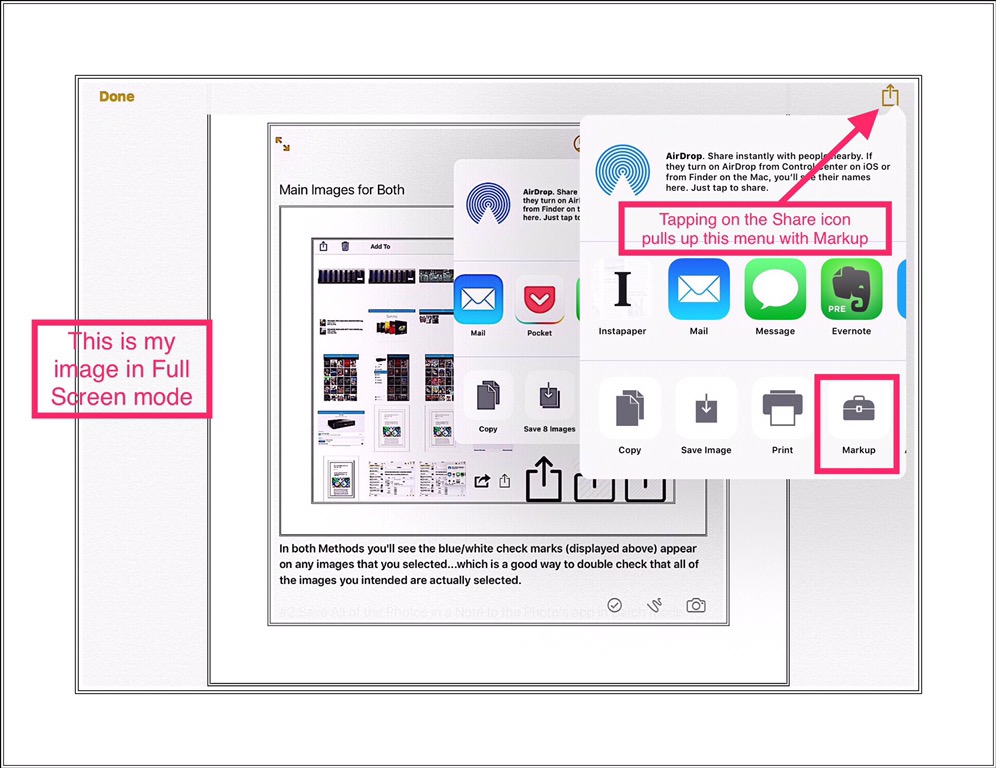
There Are 2 Ways You Can Invite Readers to Subscribe to or to Follow Your Blog

Method One

Putting aside my confusion for a moment, one support article that I read today is responsible for helping me recognize my error. It’s an article about using short codes within the body of your post to provide readers with a way to subscribe or follow your work. This is a link to it. An example of how it functions should appear immediately below. Exactly what does appear below will vary based upon the circumstances. If you’ve already subscribed to someone’s blog, you’ll just see a statement telling you that. But if you haven’t, a form will be displayed that will give you the opportunity to sign up.

Enter your email address to subscribe to this blog and receive notifications of new posts by email.

The form will look something like below.


This is a very easy and convenient method for providing readers with the option to subscribe to your blog. It’s also one I’m going to start incorporating it into all of my blog posts. It’s easy because all you need to do is add this shortcode anywhere in your post or page that you want to invite readers from (making sure that you add it using the HTML editor, not the visual one.)

The Shortcode to add:


Method 2

The second method isn’t quite as easy, but it’s not really difficult either. It involves using a Widget. You can find all the Widgets available to you in the WP Admin Dashboard under Appearance.


Here’s a link to the WordPress support article giving you step-by-step instructions for adding this Widget.

The WordPress Reader

Quite some time ago I wrote a post about how much I like the WordPress Reader. The Reader is an RSS feed aggregator, which in laymen’s terms means that it’s a place people can go to read all of their news in one place. The reason I mention it here is because there is a 3rd way that readers can follow,your blog. That way is by using the reader. It’s a really cool alternative, but it’s limited only to those people who have a WordPress account. If you go to my post on the subject you can find out why I love this method so much and why I think the WordPress Reader is really amazing.

It’s so amazing in fact, that I think people should consider creating a WordPress account just so that they can use the Reader as their news aggregator!

My post about the WordPress Reader

Conclusion

Even though most of my readers are complete strangers and they arrive at my site from Google searches, I’m beginning to appreciate the nuances of having a loyal readership base as well. The idea of having a small community of people who love the same kinds of things as me is a really appealing one. Even more appealing is the concept of exchanging ideas and sharing the things we love. So, I’m hoping that by starting to focus on a more personal aspect of my blog, that maybe in time all my readers won’t be complete strangers from Google.

Comments

I really love getting feedback from my readers! 

Therefore I try to make it as easy as possible for readers by not requiring you to add your email address, unlike most comment sections you’ll encounter on blogs. I’ve gone a step further though because you don’t even need to include your real name. You do need a name of some kind…but that can be whatever you want it to be.

← Back

Thank you for your response. ✨

Posted in Blogging, Followers, learn to blog, Learning to blog | Leave a comment

Keep Window’s Computers Safe from the Newest Hidden Exploits in 2017

Hackers Are Constantly Creating New Malicious Attacks

An Especially Scary Exploit, Known as the Stegano Exploit is a Recent Threat You Don’t Want To Encounter…

But just in case you do, I’ve written this guide about how to handle it.

img_4510

That’s why it’s so important to stay one step ahead of them. I recently read an article about a new kind of exploit that occurs silently, behind the scenes, and it takes the form of some malicious code that’s hidden inside the pixels of an image. I’ve known about the possibility to hide code inside pictures for many years…although I never really understood how it works.

This new exploit uses that concept and it’s explained very well in this article by WeLive Security. The important information to be gleaned from this article I highlighted in the pictorial guide I made below. Please look at the pictorial guide closely, as I’ve included the most important elements for protecting yourself from this exploit within it.

If you double click or tap on this image it should open to full size.

Here are a few more pointers about the important aspects of this article.

  • It’s a good idea to use a browser extension like Ad Block Plus or NoScript which adds one more layer of security to keep the malicious stuff away from you.

Ad Block Plus Chrome

Ad Block Plus for FireFox

  • My last suggestion is to use 3 different programs to protect your computer and keep all of them up-to-date. I like to think of it as the trifecta of security programs for Window’s computers.

The Window’s Security Program Trifecta

  1. Anti-Virus program (we use ESET NOD32)
  2. Anti-Malware program (we use Malwarebytes Premium but there’s also a free version you can learn more about)
  3. Anti-Exploit program (we use Malwarebytes Anti-Exploits which is now included in their version 3 of Malwarebytes Premium. But when we first began using it, it was a separate program which is still available as a standalone beta here. The beta is free to use, but it’s important that you remember to update it frequently.

Why Use All 3 Types…Isn’t That OverKill & Don’t They Interfere With Each Other?

The answer to that question is a resounding NO! That was a concern many years ago, (and by many I mean roughly 4 years ago,) but that is no longer the case. There are so many more threats out there today that the companies developing these programs had to come up with ways that they could work together.

In today’s world they do work well together…especially if you get them from the same company…although very few make all three. Each type is highly specialized and constantly updated, so you’re doing yourself a disservice if you run Windows and you don’t arm yourself to the hilt with protection!  You can read a little more about this here…then at the end of this post I have some more links too.

What to Do if A Malicious Program or Pop Up Threatens You

Before I knew any better, my instant response to an imminent threat was to unplug my computer! While this isn’t a bad thing to do…(the chance of it hurting your OS is minimal, but you could lose some data if you haven’t saved some current work)…I now know there are better ways to handle the situation.

First I’ll tell you what you shouldn’t do.

You shouldn’t close the browser window the normal way…using either the big X or Close that may be displayed. The reason is because by doing so you will have set in motion the exact sequence of events you were trying to avoid. This article does a good job explaining this and provides 4 alternative methods for leaving the imminent danger. But for me that’s TMI (too much information) so I think you should just pick one to remember.

Next is What You Should Do

Close the browser using one of the methods described in this article. I picked the Alt+F4 method because it seems to me to be the most popular. So I wrote this brief Guide to the Alt+F4 Shortcut.

Then run scans using your anti-virus and anti-malware programs. Additionally you could run a 3rd scan of CCleaner too. CCleaner is a free program that does a really excellent job of cleaning up your computer. It oftentimes finds some things missed by other programs.

After you’re certain everything is fine maybe log your event somewhere…I use Evernote (it’s a free Note app I’ve written about here)  for things like this…just in case future problems appear. It’s nice to, to have a record of what happened since weeks later I’ve usually forgotten most of the details and just have a fuzzy recollection that something bad occurred and I dealt with it successfully.

CCleaner Versions

Why I Haven’t Been Writing A Lot of Post About Computer Security Recently

I haven’t written a post about computer security in a very long time because I almost never use a computer anymore. I love the mobility and freedom I experience using iPads!  Now I realize that there’s one more thing I love about using iPads instead of my Windows computer…which is the lack of constant worry brought about by hackers and malicious attacks.

my home office computer

This is my home office where my computer is…I primarily use a standing desk but have a monitor on a regular desk too.

That’s not to say that ios users are completely safe from danger…but they are much less prone to those kinds of problems than Windows and Android users are. So too are Mac users. I wish I could say my choice to downplay my use of Windows was planned, but in fact it came about because I need some help with relocating the C: drive contents…after one failed attempt. Life is busy and I havent yet dealt with that. In the meantime I did get a Mac mini computer. I don’t actually use it very much either because it’s basically for managing our massive iCloud database. But when I do, I don’t maintain my typical Windows ‘on constant guard’ mindset!

Granted, I’m the exception when it comes to excessive worry about online security. If you’re interested in knowing why that is you can read my recent, very personal account of when our home network was infiltrated  by hackers and we became unwilling participants in a massive Botnet.

Recommended Reading, Resources and Links:

Learn more about Adblock types of programs with Tom’s Guide to the Best Adblockers & Privacy Extensions 

What’s the Difference Between Anti-Virus and Anti-Malware programs?

How to Geek’s article on How to Use an Anti-Exploit Program to Protect You From Zero-Day Attacks

Comments

I love to get feedback from my readers! I try to make that as easy as possible by not requiring you to add an email address, or even your real name for that matter. You do need a name of some kind…but that can be whatever you want it to. Because it’s your feedback that’s important to me. I’m not interested in collecting readers email addresses and or creating a subscription mailing list because I just don’t think that the kind of things I write about warrant that kind of treatment.

← Back

Thank you for your response. ✨

Posted in Computer & network security, Computers, Security | Tagged , , , , , | Leave a comment

Save Time Using 3 Tricks in Apple Notes | ios 10 | Markup Photos in Apple Notes

 The 3 Tricks Explained Here Include:

#1 Add Photos to Apple Notes in Batch Mode ios 10

#2 Save All of the Photos in a Note to the Photo’s app Camera Roll in Batch Mode

#3 Markup a Photo While Within the Notes App

You’ll find detailed instructions with illustrations for each trick immediately following this kind-of long introduction.

Introduction to Markup & Background

Number 3 above, using Markup in the ios Notes app, is something I spent a lot of time on one day…I was trying to figure out if this was even possible to do. I finally concluded it wasn’t…at least not presently. But then a few days later while I was again working within the Notes app I accidentally discovered how to access Markup within Notes…and guess what? It’s become a great time saving tool for me.

That’s one aspect of Evernote that I really love  and it’s one important reason for Evernote’s solid ranking as #1 amongst note taking apps. Evernote calls this feature annotate. They allow you to annotate both images and PDF’s that are attached to your notes. No competitor I’d tried to date offered this feature, yet it’s one that I use every day.

Specifically, I can place any image (a photograph, a chart or diagram, a screenshot, color sample tiles, or even a hand drawn illustration) into a note and then mark it up by ‘writing’ on it or by adding graphics to it, things like like framing sections within it for example…using lots of different colors.  I can add typed or handwritten text, arrows, checkmarks, I can circle things, border things or put big X’s on…I can even remove distracting elements appearing on the original by writing over them in my background color…the possibilities are limitless!

 Markup versus Markdown

That’s what the word Markup means…it’s a popular, newly coined term from the digital age I think. Markup is, I’m pretty sure, what Apple calls this…but there’s another similar term that’s easily confused called Markdown. My understanding is that Markdown refers to a sort of shortcut language used for building web sites and online content. It replaces HTML which is the primary code type used for web work. But both were created in part for their operability with online content. So it’s easy to get them confused. 
Here’s my guide to usage of both terms. Generally you can let the content decide the meaning. Both terms are used interchangeably often…and incorrectly often…by me and many other people too. So if someone is talking about MarkXXXX and it’s a conversation on annotating things they mean Markup. If they are talking about coding for their website…it’s Markdown. But if they are talking about coding and say Markup….you’ll know that they really mean the Markdown language for web creation.

Ultimately, I can even save the final ‘marked up’ image back to my camera roll with all my new additions or markups on it!  In Evernote my markups are nondestructive.That means that I can reopen the image whilst in Evernote and remove or change the marked up bits. I can accomplish this feat anywhere, at anytime…as long as I have something that gets me online.

This is such a useful tool for me that it bears repeating…that the ability to annotate my content is a significant reason that Evernote retains it’s revered #1 spot in the lineup of apps that I need for writing my blogs and creating graphics for my YouTube channel.

If you’re interested, here is another recent article I published following ios 10’s release, which compares the new and improved Apple Notes to Evernote.

Apple’s New Tool is Called Markup

Lately Apple has been releasing updates for ios 10 monthly, so I figured my failure to find this feature might have been their oversight which meant that it would probably be remedied soon. Then just a few days ago I found that I could do this after all!  Whether this omission fixed or I just completely missed it initially I’ll never know…but I had just installed an update to ios and I have noticed a lot of other little tiny glitches in the Notes app that no one else would ever pickup on have also been tweaked, or fixed.

It’s an important enough of a discovery that I think it may have a much wider audience than the batching capabilities which I also discuss in this post. That’s why I’m singling it out.

To be completely truthful, I remember Apple rolling out Markup in ios 9 on a limited basis. It was only available within the Mail app and I never  had any need for it so I never used it in ios 9.

The Tricks a Step-by-Step Guide

#1 Add Multiple Photos to a Note at Once

(this is also know as Batch Mode)

You Can Add Photo’s in Batches to Apple Notes Instead of One at a Time


This can be accomplished in 2 ways.

Method 1

This method is primarily carried out in the Photos app. It involves selecting and copying several photos and then opening the Note’s App note to paste them in.

The Steps for Method 1

  • Go to your camera roll
  • Tap the word Select the upper right and then tap on several photos to select them (in the order that you want them to appear*)…a white/blue check mark will be added to each selected photo
(*I’ve noticed that sometimes the order images appear within a note using this method varies. It must be something inadvertently changed when new ios updates come out. So, if order is important check this first with a test case. 2 themes dominate…either they appear in the order you selected them or they are reversed, appearing in the opposite order.)

  • Tap on the Share icon ⍐︎ that appears in the upper left corner.
  • A new screen will appear with 2 lines of menus at the bottom. Use the 2nd, or the bottom menu and look for copy command. When you find it tap on it.

  • Go to your note and place the cursor in the exact position that you want the images to appear.
  • Long-press in that location until you see a popup menu with the word ‘Paste‘ and tap on Paste.

The images will appear here momentarily in the order that you selected them.

Method 2

This method requires a little forethought to batch-add the photos in a precise spot. It’s also carried out from within the Photo’s app (aka the camera roll.) The reason forethought is necessary is because you can’t easily manipulate the placement of the photos using this method…the photos will all be added to the end of your note. But you can designate their order. So if you think ahead as you’re creating or writing a new note, it’s easy to orchestrate adding multiple images as you write.

The Steps for Method 2

(Everything in this method is identical to the first except the last step…the source you select for your action. Rather than Copy…you tap on Note.)
  • Begin writing a note and when you arrive at a place where you’d like to add images, stop and create or find the images you want to add, getting them into ‘final form’ in the camera roll.
  • Go to the Photos App and using the word ‘Select‘ in the upper right corner, select all the photos you want inserted into your note using the exact same selection process described in Method 1. Make sure that you select them in the same order that you’d like them to appear within your note.
  • After each photo you want to insert has a blue/white checkmark on it, tap the share icon ⍐︎ in the upper left corner (just like in Method 1.)

  • This time, rather than tapping ‘Copy‘…look for the Note 📝 icon in the top menu row of apps and tap on it.
  • A little Note pop-up will appear where you can select the note that you want the images added to. You can also add some additional text here if you’d like.


Below is a screenshot of the note pop-up, which I’ve already added some text to. After you’ve added the text you want tap on the words ‘New Note‘ on the bottom right to select the note you want the images attached to.


Below is a screenshot of the list of notes displayed. There are more revealed by scrolling down. Just tap on the note you want and a check mark will appear in front of that note’s title. If you make a mistake just select another one.

After you have the correct note selected, tap on the word ‘Back‘ in the upper left corner. You’ll be taken back to the first pop up screen. Then tap on the word ‘Save‘ (shown in the first screenshot directly above) in the top right corner.

Your images will be added to the end of the note that you selected. The text that you entered will appear below the last image (refer to the screenshot below.)

Main Image for Both Methods

In both Methods you’ll see the blue/white check marks (displayed above and below) appear on any images that you select…which provides a good way to double check that all of the images you intended are actually selected.

#2 Save All of the Photos in a Note to the Photo’s Camera Roll in Batch Mode

This is super easy to do and I just discovered it by accident today. If you want to save all of the images in a note to the camera roll, you can do so in one fell swoop just by tapping on the Share icon  ⍐︎ in the upper right corner of a note and then selecting the “Save x # of Images” command in the pop-up menu that appears. See below.

#3 Markup a Photo While in a the Notes App

After spending quite a bit of time trying to figure this out, my efforts yielded nothing. Then today, I just happened to stumble upon a way to do it while I was working on a note with images. It’s super easy when you know what to do!

Just tap on a photo or image that’s already in a note. This puts the image into ‘full display mode.’ Then tap the Share icon ⍐︎ in the upper right hand corner of the image. After you’ve done that a pop-up menu will appear, showing Markup as one option.

If you don’t see Markup, you may need to scroll to the right side a little more (by swiping left) to reveal more possible actions. See the screenshot below:

If You Want to See More Markup Tips for ios 10 Visit my Newer Post

Comments

Please leave me any comments below.

← Back

Thank you for your response. ✨

Posted in Apple, Apple apps, Apps, ios, iPad | Tagged , , , , , | Leave a comment

Pages for ios |  Remove Red Misspelled Word Underlines

Updated January 19, 2019

The Problem

Pages for ios has been vastly improved in recent years, and it has become my go-to app for creating layouts that I use as illustrations on my websites and YouTube Channel. It’s also my go-to app for more traditional word processing…but I don’t have much call for that these days. I mainly use a combination of  Apple Notes and Evernote for most of my text editing tasks, which I wrote a lot more about in my recent post comparing the two.

But there’s one annoying characteristic of Pages…and in fact it occurs across the board with all of Apple apps for ios…misspelled words are underlined in red.

This feature is particularly bothersome because it’s applied to names too. Since I write a lot about apps, devices and things with names that aren’t in most standard dictionary’s, much of what I write about falls into a vast category that Apple identifies as Misspellings.

99% of the time the ‘misspelled ‘ identification is wrong!

See my most recent example of when this occurred below:

Contributing Factors

This wouldn’t be a problem if you could add personal names to a custom dictionary…most word processors let you do this. In fact Pages on a Mac computer lets you do this. Pages on a Mac also lets you ignore a spell check suggestion. But you can’t do this using Pages on ios devices!

What can you do…especially if you’re creating layouts that you intend on taking screenshots of?

The Solution

The Solution, while not sophisticated, at least solves the problem for my purposes…it just removes the annoying red lines under the names of the things that I’m writing about. The solution is to turn Spell Check off completely.

Here are the steps for turning off Spell Check (you can refer to the screenshot above for an example):

  1. Tap on the three small dots in the upper right hand corner of the screen – this takes you to Settings for Pages
  2. Scroll down until you see ‘Check Spelling
  3. Tap on the green slider switch which should be in the ‘on’ position currently…so that it switches to ‘off.’  You’ll know it’s done correctly when you no longer see any green.

Instantaneously…any red lines that were displayed should disappear!

Updated Information for ios 12

The steps for ios 12 (and possibly 11) are a little different. After tapping on the 3 dots look down in the menu for Settings – AutoCorrection. Turn off Check Spelling. See the screenshot below.

Where 'Check Spelling' can be found in Pages ios 12.
Where ‘Check Spelling‘ can be found in Pages ios 12.

How to Let Apple Know That You Want This Fixed

If you’re still annoyed at the lack of control you have using Pages in ios, you can go to the App Store and write a User review mentioning this problem. The developers rely on these reviews a lot for future enhancements, so the more people that write this in as a suggestion, the better the chances are that this will be fixed someday soon!

Example of a screenshot I made in ios Pages for another post.
Above is an example of a screenshot I made in ios Pages for another post.

How to Turn Spell Check Off Completely in ios 10*

If you want to turn off Spell Check universally for your whole iPad …you can do so in Settings – General – Keyboard – Under the section that says ‘English‘ you’ll find Spell Check which can be set to on or off.

I found a great article giving you the above directions in a step-by-step fashion here. And I made a PDF of the steps you can download here.

You may be amused to learn that I struggle to correctly spell the word ‘misspelled’! I can’t explain it but the correct spelling just looks wrong to me! I personally think it should be ‘mispelled’…which just looks right! This tells me that I’ve probably been misspelling this word my entire life!

*This is still pretty much the same in later versions of ios.

Comments

If you’d like to read other’s comments, (assuming there are any,) or leave a comment yourself, please do so by scrolling way down this page…past my bio, past the WordPress ads, and past the Related Posts section…to the little Comment box.

Look for something that resembles this:

Comment section for vsatips Comment section for vsatips
Posted in Apple, Apps, ios | Tagged , , , | Leave a comment