Update October 2017
I Decided to Repost This Because it’s Really Important, Really Timely & Because October is National Cyber Security Month

Friends and family members have helped me to understand how utterly boring this entire topic is to the vast majority of people. Even to my followers who tend on average, to be much more knowledgeable about these kinds of things. Despite that, I implore you all to read this post through one time. It’s information that everyone really needs to know and understand enough about to follow the easy steps I describe towards the end.
This post was originally written about 6 months ago. In it I describe some simple measures everyone should take to insure that the networks they use the most, their home or small business ones, are secure and protected from hackers. As I already mentioned, the information I discuss is extremely important because it helps to ensure the security of your personal data and devices. Everything from cellphones to computers.
There have been several huge new data breaches, which makes these measures even more important, and that’s is why I decided to repost this. I’ve also added a lot of new information to it. And, it’s this is a great lead-in for the next post in my Firewall Series. While 6 or 7 months doesn’t appear to be a very long period of time in the real world, in terms of the internet world, it’s a very long time indeed.

Why This Post Is So Important
Everyone who uses the internet requires a network to do so. For most people this means that they have their own networks that they maintain in their homes and if they run their own business it’s quite likely they maintain a separate network for that. Any network needs a gateway device that brings the internet service you use and probably pay for from your ISP (internet service provider,) into your home for use. It’s the security of this gateway device that’s so critical.
For some inexplicable reason there’s a huge disconnect in people’s understanding of the security of these gateway devices. The type of device in question may be a standalone modem or it might be a combined modem and router, or possibly even a 3-in-1 type of device that also creates a WiFi network. Regardless if the type of device it is, when you first set it up there’s one crucial step that needs to be taken to assure that your network remains secure. That step is to remove the default credentials that come installed on it and replace them with your own.
Most times the default credentials are something like admin for the username and admin for the password. Every brand of hardware uses their own default credentials. It’s relatively easy to discover what the default credentials are for any given brand because the manufacturers of the devices expect that users will change the defaults as a part of the install process. That’s where the disconnect comes into play. Most people don’t know that these defaults even exist and that they need to be changed to something secure.

The main reason most people don’t know about this is because the devices have become very easy to install. They can generally just be plugged in and then need to be activated by calling your ISP. ISP’s fail to mention to users that after the activation users should secure them, and most people never even use the default credentials to log onto the device because there’s no reason to. But, even though you don’t log onto it, trust me, hackers can and will if the situation arises. Why would they do that? Because that device provides easy access to all of the devices that are using the network in question. Once a hacker has access to your network, hacking into individual devices is relatively easy.
But if you change the username and password of your gateway device (i.e. Your router or modem) to something that only you know, hackers will never have that opportunity. There’s one unintuitive aspect to logging onto these network devices. But once you understand that you’ll see that changing these credentials is easy. The aspect that tends to confuse people is that to change the credentials you need to logon to the router using a web browser like Safari or Chrome. Using the same address bar that you would typically enter your Google search in, instead you enter the IP address for your device. The manufacturer should provide the IP address for you. If you can’t find it Google the model number of your device along with something like, ‘how to login to a net gear router model # XXXXXX’ and look for the manufacturers support page that provides this information.
Oftentimes the IP address will be something like 192.168.0.1. After you enter the IP address hit ‘Enter’ and you should arrive at a screen that looks something like this:
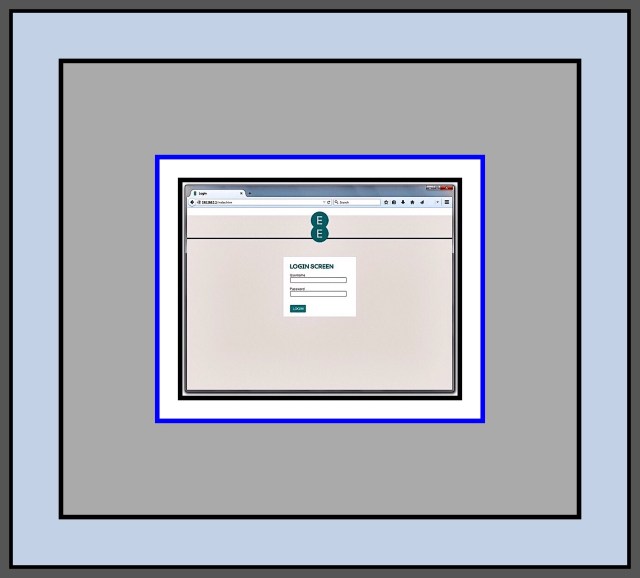
Once you’ve arrived at the login screen simply enter the manufacturers default username and password and you will be taken to the router’s settings. From here look for a menu item that lets you change the default to something else. That’s all there is to it to making your network much safer and more secure. Further down in the post I show you more detailed instructions for accomplishing this, as well as some other settings you might want to consider changing as well.
Why a Standalone Modem is a Good Idea
The reason it suddenly dawned on me that I should repost these instructions is because we’re in the market for a new network modem. We recently upgraded our internet speed to 300 Mbps and our old modem couldn’t provide adequate throughput…so we switched to one offered by our ISP, Spectrum. But that one seems to have problems and I think it’s because it’s not just a simple modem but an ‘all-in-one‘ which also functions as a router and creates a WiFi network too. After a lot of research I’ve learned that using these multi-function devices when you don’t need the additional functions they offer at best, isn’t an ideal situation, and at worst, can cause latency and signal dropping problems. Since these are some of the problems we’re experiencing, I decided we need to replace our modem.
Once I’ve decided upon the new modem I may write a post about that process…because it’s taking much longer than I would have thought it should take! But in the meantime…I ran across this handy chart that Spectrum (formerly) Time Warner Cable provides for accessing the credentials of all of the modems they supply customers with. Since it can take readers some time and effort to find out this information on their own…and because it’s precisely what the topic of this post is all about, I decided to update this post and include this handy chart.
Below: Spectrum’s Handy Chart for all of their Modem credentials as well as their own step-by-step guide for changing the default credentials on their provided modems.
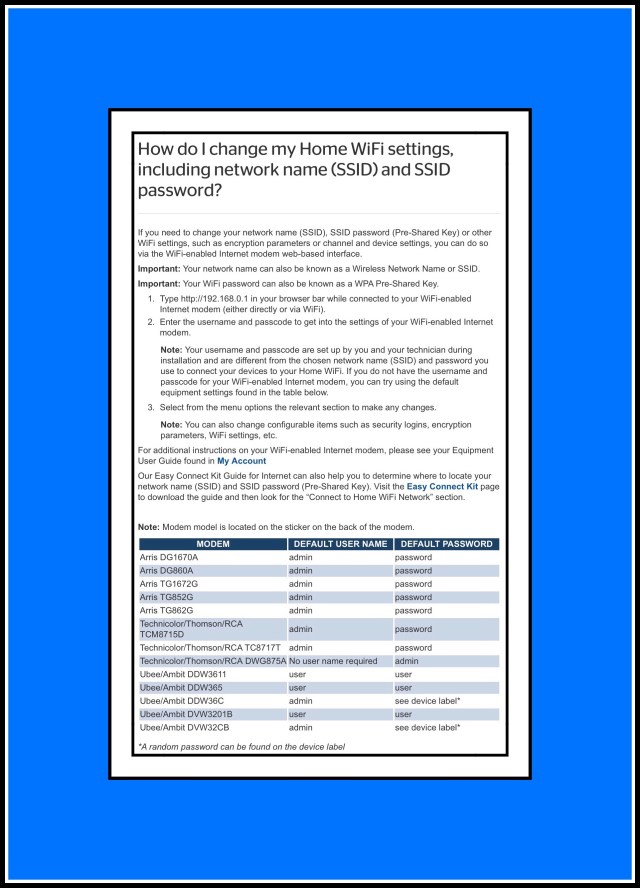
Spectrum, as well as most internet providers have the tools available to their customers…usually online, to help them take the measures they need to protect their home networks. But they never tell the customers about them! This is so extremely important yet I never even knew that Spectrum provided this webpage for all their customers…and it took calling their tech support, which you know is a pain, to find it!
Introduction
I’m writing what’s ending up to become a very long series of articles on Hardware Firewalls. My initial goal was to introduce home users to this type of device and to show how they can be used in the quest for keeping computer networks safe. I wanted to tackle this subject because there isn’t a lot of information out there for home owners yet. But more importantly because there’s an emerging market of devices designed specifically for that purpose. I didn’t really realize however how complicated the topic would become.
Mainly because this is a new and rapidly expanding range of device types that’s exploding onto the marketplace which are focused upon serving this formerly ignored, but very real need. So the situation is this. With my Hardware Firewall article I’m trying to introduce home users to an already vast array of very new products, while concurrently giving adequate coverage to the many more that are planned to launch in 2017.
It seems like within this new niche there are almost as many different approaches for addressing this need as there are new devices. The product group as a whole is still too new to have any sort of order. Confusion will dictate until people have had enough time to try them all out and decide which approaches really work the best. So, my firewall article has ended up becoming a huge undertaking…one that I hadn’t anticipated. I’ve been struggling with how to simply represent all the new devices well in written form, much less try to compare and contrast them in an evaluative manner.
While working on that it suddenly dawned on me that people should know how to secure what they already have too. So this post began as yet another section that I was adding to an already far too long and complicated article. Ultimately I realized that this section could and should, stand on it’s own. It’s a separate and important enough topic in its own right and my unfinished firewall article is already way too long!
Why You Should Secure Your Network
Every computer network has one device that acts as the gateway to the internet. That device may connect to other network components that together compose the architecture of your network. Regardless of whether or not that network is large and complicated or it simply consists of one device…it all relies upon one key gateway device. This network serves every internet device within your home or office. Every single device from servers, computers and printers on down to smart light bulbs rely upon this network’s proper functioning.
If the network is hacked or stops working…then none of these devices will work. If your network is taken over by a Botnet for example, which is something I speak from personal experience about, then it’s quite possible, and in fact likely that your network won’t always be available for your own use. Sometimes it may work, but other times it won’t. This inconsistent pattern of fluctuating up and downtime is one key indicator of a possible Botnet.
For sure it was our own Botnet experience that led to my becoming slightly obsessed with making sure our own network is always secure. This happened in the early days of networks. Our network had been secured, up until the point when one of our teenagers decided our aging router needed an upgrade. He installed some open source firmware on it (called DD-WRT) which was actually really great but he inadvertently removed the encrypted password needed to access our wifi in the process. He also enabled remote access, and opened a port for port forwarding. He only thought to mention the upgrade to me, keeper of the network, after the fact, although he had run the concept by and garnered the necessary permission from his Dad beforehand. Truth be told neither of us really had a clue about the importance of our router back then…so when he did tell us about it we weren’t really concerned.

How to Tell if Your Network is Part of a Botnet
Within a few months time we began having network outages as well as other annoying computer problems which started cropping up on a fairly regular basis. Slowly, over time our problems increased to a point where our network was rarely usable and most of the computers in our home seemed really virus prone and exhibited other aberrant behavior too. Our problems went way beyond the typical ones of the era…things like constant online popups, many spammy emails and occasional virus alerts were just the tip of the iceberg. At it’s worst point we’d watch while our computer’s would wake themselves up or change screens or applications right before our eyes. More and more it seemed like something or someone was controlling our computers much of the time.
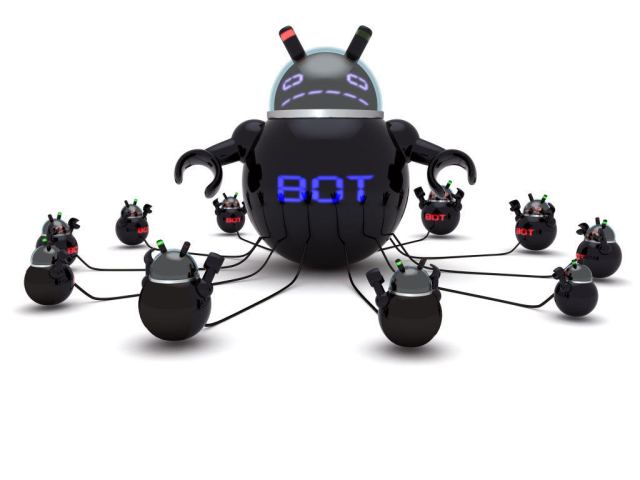
If your network begins to exhibit this kind of behavior, it could be due to several factors. One of the network device’s might be malfunctioning, other unauthorized users could be using your network, or it could be that a Botnet has taken it over too. Most Bot Master’s (they are the hacker’s who manage the Botnet) will allow their victims to keep using their devices and their networks because they want to prevent them from growing suspicious which could lead them to take the necessary steps to oust the Botnet. Many more Botnets today are formed without involving computers at all. Their targets are networks with a lot of smart home or IoT (Internet of Things) devices. That kind of Botnet may never really register any obvious signs to their victims, which is one of many factors that makes this type of Botnet more attractive to the hacking community.
What Do Botnets Do?
If you’re wondering what hacker’s use these Botnets for, the short answer is that they are able to combine the ‘computing’ resources of all those small processors into one large, more powerful computing weapon that ultimately is used for the rather mundane activities most business-focused hackers provide as services to their clients. Crimes aimed at the general public which are things like massive spam email campaigns that send out Trojans or virus-laden emails designed to entrap even more Botnet victims, or phishing campaigns designed to steal and then resell user identities or simply just acquire lots of user credentials for future theft involving financial transactions. Crimes aimed at the corporate world are generally designed to harm companies by attacking the computers that they depend upon to run their businesses.
You’ve probably heard of and wondered what DDoS attacks are. DDoS attacks are the main type of attack that Botnets are used for. They are very simple attacks which just rely upon lots of devices sending requests to the same computer at the same time. The sheer volume of the requests overwhelm the computer so much that it can’t do anything else like perform the tasks the business needs it too, to operate. The attacks can end up causing not just huge software problems but also hardware problems. So, while these may sound like confusing, highly technical concepts that are difficult to understand, in fact they are really just pretty ordinary ones that are performed using pretty low level functions. Most IoT devices have cpu’s in them which are tiny, but when they are all combined together they can be quite powerful and easily capable of performing these low level attacks.
Which explains exactly why securing your home modem is so effective. It’s really just a pretty simple action that you can take but it ends up keeping your router’s credentials private and under only your control. The sheer magnitude of protection that this one simple step affords is well worth the effort. Because in the larger picture, it’s your entire network of devices that you’re protecting…it benefits every single device within your home that can interact with other devices.
In any event, preventing these kinds of malicious attacks from occurring is much, much easier than it is to fix the kind of problems that will arise after an attack occurs. That’s why it’s so important to secure your network now.
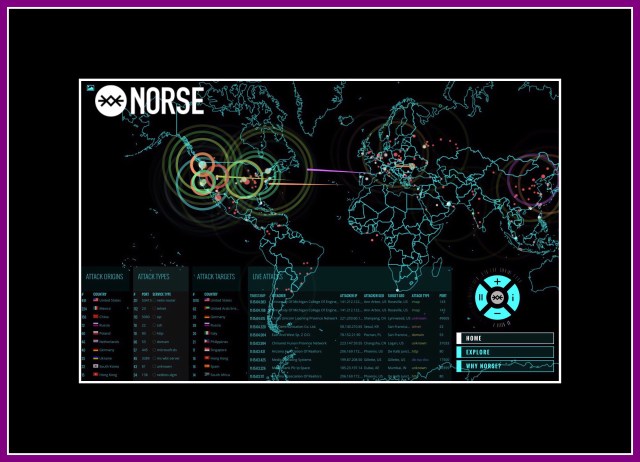
If you’re not convinced yet, take a look at this 6 minute video which does a great job illustrating some of these concepts.
A New Wave of Botnet’s Has Recently Appeared as Another Major Threat
I didn’t include this in my original discussion of botnets, because it wasn’t really something that was considered an imminent threat back when I first wrote this in March. But now, everything has changed. Botnets are back big time now and the need for family’s and individuals has never been greater for you to take a few minutes to secure your home network with the steps I describe in this post.
This new wave of Botnets is very different from the kind of botnet that took over my family’s network. Their primary purpose is to mine bitcoins. The whole topic of bitcoins is itself an extremely complex one and I don’t pretend to understand all that much of it myself. What I do understand is this. Bitcoins are a popular form of currency that are ‘created‘ by being ‘mined.’ This mining activity uses a huge volume of computing resources. The computers required to successfully mine bitcoins would be very expensive to assemble and maintain…just the energy alone required to run one 24/7 is costly. What then are potential bitcoin miners without the proper resources to do? The answer is use other people’s computers without their knowledge. That’s exactly what a bitcoin mining botnet is…a network of innocent people’s computers that have been commandeered in working for a bot master to mine for them.
You might think to yourself, well, at least if my machine is taken over by this kind of a botnet I don’t need to worry that it’s going to go around hurting others…so I won’t worry about it too much…but that would be the wrong assumption to make. Because if a hacker can break down your security and enter your machine, every single bit of data contained with in it or that even simply passes through it on its way to the internet, is now accessible to that hacker. It’s only a matter of time before your credit cards and bank accounts are hacked too.
I truly don’t want to frighten readers…that’s the last thing in the world that I want to do. But we lived through all the horrors of having our network hacked. It was perhaps the worst ordeal of my life (despite that I almost died once!) and probably of all my family members too…even our kids. From start to finish the whole ‘awful period’ was about a year and a half long. It took that long for us to finally regain control of our network. We spent thousands of dollars hiring network consultants and replacing devices that simple wiping and reformatting didn’t fix. There were a few computers that were replaced multiple times. We couldn’t safely go online at all…and most of the time couldn’t even get online unsafely…because the botnet was using all of our bandwidth. It’s not an experience I want to ever see another person or family have to go through.
That’s why, when I read about this new wave of mining Botnets I understood what a huge threat this poses to everyone…it’s a huge security concern for every single computer user today. It’s not a new kind of botnet…there have been bitcoin mining botnets before…but the economics of bitcoins have made the concept very popular amongst hackers once again. Even more worrisome is the fact that it appears this newish type of botnet is rapidly growing and gaining in popularity amongst even novice, or noncriminal hackers…it has a very broad appeal because it’s pretty easy to orchestrate for a hacker. This provides even more compelling reasons for you to make sure that you take the proper measures to protect all the computers and devices within your network right now!
Which Device Really Needs to Be Secured?
My firewall article will go into much greater detail about device protection…so this post is simply about securing what you already have in place for your network.
In 2017 almost everyone refers to their main network device as a router…but many cable and telephone providers actually provide their customer’s with combination units which include the modem function too. The difference is that a true modem just receives and re-transmits the provider’s signal into your home while also converting it from requiring either the telephone line cable or coaxial cable it enters the building with…to allow it to be used with an ethernet cable instead. So, users’ just need to stick to using one kind of cable, an ethernet cable, within their homes. Modems differ from routers because while modems bring the signal in, routers take that signal and divide it up for users to better access. Oftentimes the signal is split into a LAN (a wired Ethernet network) and a WLAN (a WiFi network.) But oftentimes routers also include several more LAN ports on back so several devices can connect to the LAN (also called the hard wired network) too. If your main network gateway device is indeed a router, than the modem (the hardware that’s necessary to receive the signal coming into your home or building and make it useable for all your devices) is actually built right into it.
So, overtime the terms ‘router’ or ‘modem’ came to be used interchangeably. The way that they are used however can vary somewhat…one type of device may be a combination or an ‘all-in-one’ device. It’s really easy to misidentify what your main device is too, because routers and modems today can look almost identical. So much so in fact, that I myself didn’t even realize until very recently that what I thought was just our modem was really a 3-in-1 combination unit. To complicate matters a little further…there are plenty of other network hardware devices that can also serve these functions too…like the traditional firewall devices that I discuss in my longer Firewall Series of articles. So firewalls can also act as a routers, as can wireless network devices…so it can get really confusing.
More Information About Some of the Newest Types of Network Hardware
Some of the newest network security devices are much more sophisticated routers with built-in security features. And then there’s another new class of routers which provide newer, more complex WiFi networking capabilities like cloud-based mesh ones which give you much faster, less problem-prone WiFi’s capable of handling gigabyte speeds. I don’t think there’s ever been a time in which there was such a vast range of network devices available to home owner’s. Gone are the days of the $75 router…the newer ones can get really pricey…like $400+ for high end versions.
Therefore, to alleviate any confusion I’ll try to to stick to calling the device which is the subject of this post, the network gateway device. It’s the first device in your network, and it’s the one that’s connected directly to your internet service provider’s incoming signal.
It’s what you do to this device that’s the important part…not what you call it…
All network gateway device’s have settings that can be changed. The settings that are most vital for you to change are the device login credentials. Yet most people aren’t even aware of the fact that these settings exist! But there are also some additional ones that I suggest you should think about changing too…especially since you will have gone to all the trouble of figuring out what the default login is and then actually used it to log onto your device already.
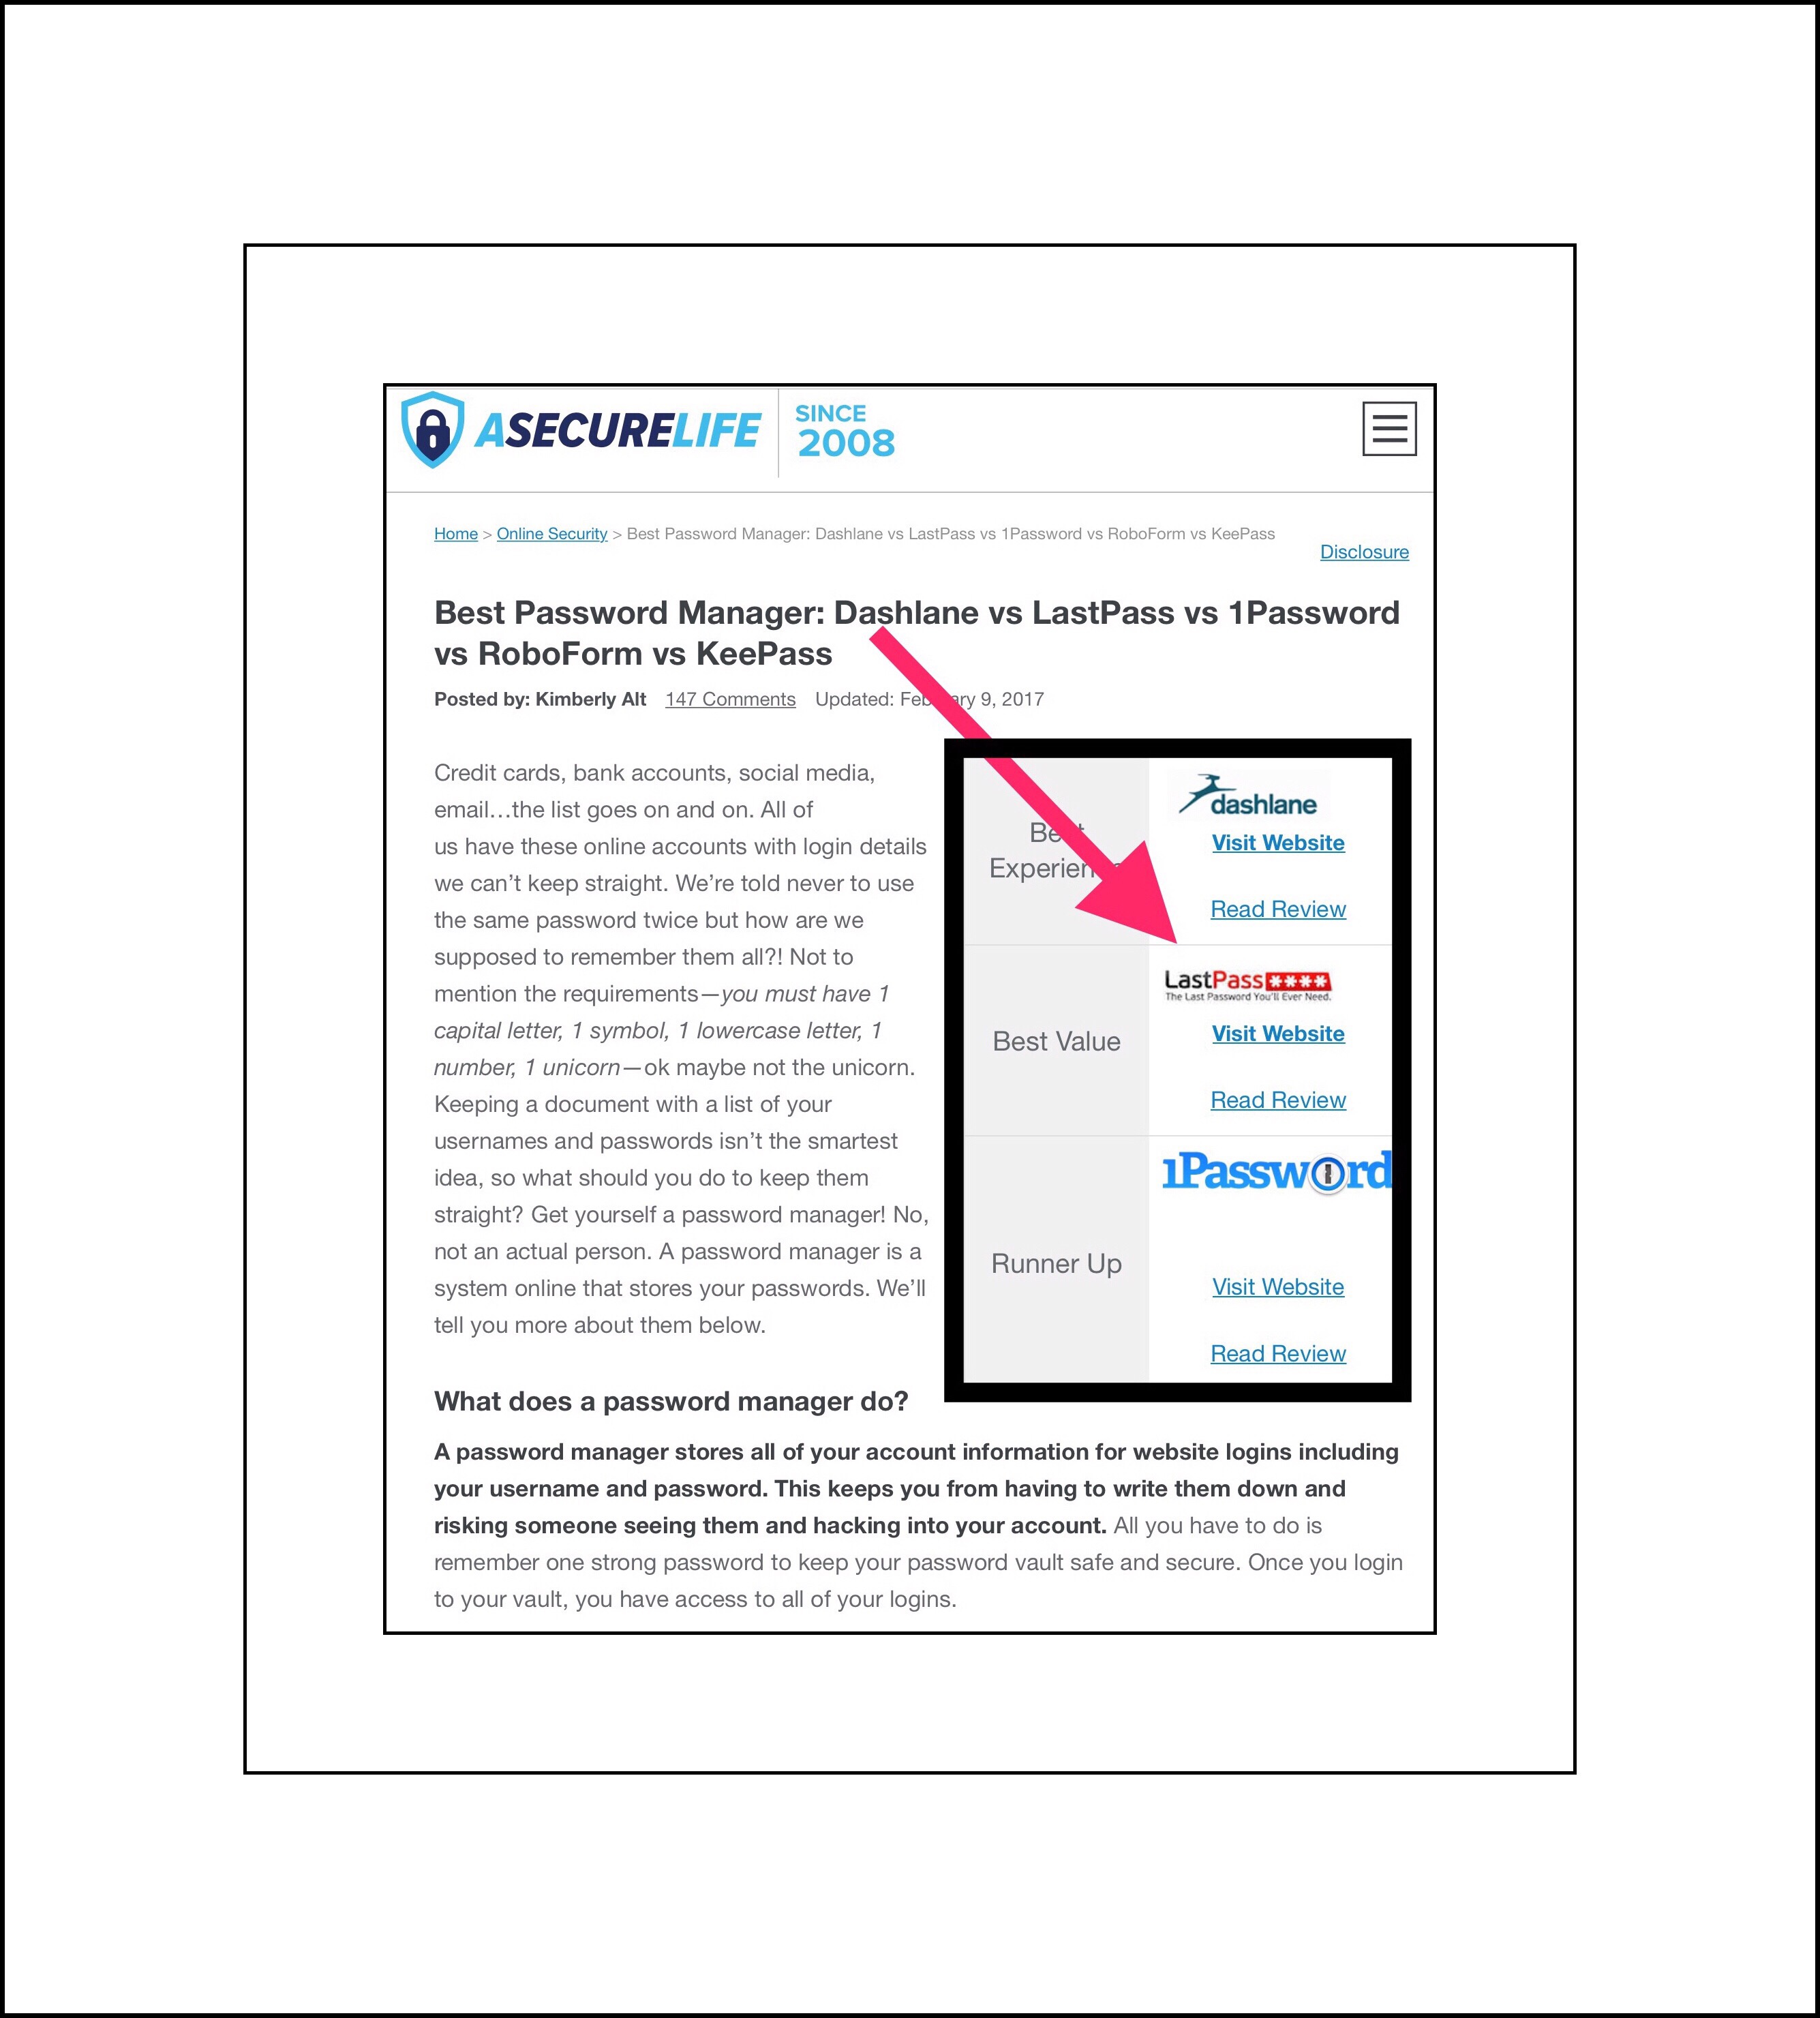
Truth be told, I’m really puzzled why this information isn’t more public. It’s something that should be handed to every new customer buying a computer, subscribing to a network or buying any piece of network hardware. But, because no one talks about this people never learn that they can and should visit their main network device’s settings online to tweak a few things that could make themselves a lot less vulnerable to outside attacks. This in my mind is more important than using strong passwords, changing them often or, best…using a password manager. It’s more important even than understanding all the dangers of emails…because once a hacker has access to your network, they have access to every single device on it too. That’s also why it’s so hard to rid yourself of this problem after it occurs. Because it can cost you a lot of money and more often than it you’ll end up having to dispose of many of your devices and getting new ones to replace them.
There are no simple fixes after the fact.
So, rather than my going into long explanations for each tweak I describe below (and risk boring you to the point of falling asleep,) I’m just telling you what needs to be changed and how it should be changed. You can Google more information about the why’s of it, if you really want to know more about each individual setting.
Since your router or modem is the gateway to your entire network…securing it isn’t just a good idea, it’s mandatory and nonnegotiable. It’s something you MUST do if you want to keep you, your personal data and your devices safe.

Our network
Because this is so important Homeland Security has created a webpage telling you what things should be secured and why.
Here’s a link to Homeland Security’s great information about securing the device that provides the internet gateway to you network.
Here’s another excellent and very detailed article about the many different ways a modem or router can be made most secure…but it’s also a bit techie.
If you don’t really understand technology and networks very well, I’ve written what I hope will be the most basic steps (for what is really a pretty complex topic) for you to follow to secure your network below.

Homeland Security’s Webpage Warning Users to Change their Default Router Credentials
When Should You Do This?
Um..now? Please? ASAP would make sense, really. But if you’re wondering if you need to do this if you’re renting a modem or router from your isp, the answer is a resounding YES! It’s your network! Don’t think twice…they expect that you will do this!
Who Shouldn’t Do This?
No one! Everyone who has a network…literally everyone…needs to do this!
Unless you’re a kid! Then talk to your parents and help them to do it if they are unsure. But don’t do it all on your own…because one tiny mistake could cause huge problems you had no idea about. Even though your parents don’t know as much as you do about all this tech stuff, trust me when I say, they do possess certain knowledge and skills that you just don’t have yet. So, your combined wisdom should be used if they can’t manage this on their own!
Parents…read my article about how our network was invaded by a Botnet if you want to understand why you should do this with your kid rather than leaving it up to them to do alone!
Steps to take to Secure Your Network Gateway Device
Step 1 to Secure Your Network:
This is by and large the most important change to make. If you do nothing else but just make this one change you will have gone a very long way towards protecting you and your family from the dangers of the internet and hackers!
Change the device’s login name and password.
FYI, my router’s login name was: admin & the password was also admin
I changed both so that hacker’s couldn’t get into my gateway device’s settings and essentially take control of it, (which, by the way, is exactly how our network was taken over by a Botnet many years ago.)
Here are 2 links that explain how to login to your router:
Link 1: CNET’s article on defending your outer.
This is the easiest and fastest method. But sometimes it doesn’t work because you can’t figure out what your brand of router is using for its IP address or it’s been changed. If that’s the case, then use the 2nd link’s steps to connect to it. If you’re a Spectrum customer refer to the screenshot I added towards the top of the post, which provides logins for all their current devices as well as step-by-step instructions.
FYI, oftentimes this is written on a sticker that’s on the bottom or the back side of the device, but if there’s no sticker the 3 most common IP addresses are:
- 192.168.1.1
- 192.168.0.1
- 192.168.100.1
Link 2: If following the steps in Link 1 doesn’t work for you then follow the steps described in this Link 2.
Step 2 to Secure Your Network:
Make sure your wireless network requires a password to join it and that the password uses strong encryption. Currently the best encryption for this is WPA2 Personal.
Here’s a link to linksys showing how to do this on many of their routers, but the Homeland Security site above also gives good advice for this.
Step 3 to Secure Your Network:
Disable any features you’re not using which make your router vulnerable to outside attacks.
Disable all of these settings
• Remote access or remote management
• UPnP (Universal Plug and Play)
• WPS (WiFi Protected Setup)
• Telenet
• SSH
• HNAP
• Port forwarding
These should all be turned off.
If you’re unsure about turning any of these off and are worried that doing so might hurt something else that you’re using….then just think about it like this instead.
If you didn’t turn these services on..who did? Some, like UPnP may have been turned on by default by the maker of your device. But if you’re not using those services, you shouldn’t leave secret doors for hackers to use to gain access to your network. Just turn them all off and write down what you changed.
If turning them off causes any unforeseen problems, you can go back and just turn them on again. If you think that this may happen because other people also help in maintaining your network…maybe a spouse, a teen, or your internet provider service people…then write in a note to yourself about exactly what changes you made so it’s easier to change back again…although I highly doubt you’ll need to do that.
Step 4 to Secure Your Network:
Write down the new login name and password and tape it to the bottom of the device. Maybe even include the IP address that worked for you.
While you don’t want this information to get lost…don’t worry too much about it. If it does get lost you can just reset the device, bringing it back to its defaults. In fact, under Step 1 above, the 2nd link step’s tell you exactly how to do that.
Congratulations!
If you’ve successfully made it all the way through this guide…congratulations, you’ve just taken some really huge steps to secure your network! Steps, which the majority of people don’t take because either they don’t know that the risks exist, or they think that doing this will be too confusing or complicated. But really it’s not, if you just know what to do, right?
If you want to learn more about ways to keep your network safe and secure you can subscribe to receive an email whenever I write a new post. The subscribe form should be somewhere below this on the bottom right side of the screen.
Comments
I really love getting feedback from my readers! Therefore I try to make it as easy as possible for readers by not requiring you to add your email address, unlike most comment sections you’ll encounter on blogs. I’ve gone a step further though because you don’t even need to include your real name. You do need a name of some kind…but that can be whatever you want it to be. You’ll find the place to leave comments by scrolling down past the end of this post and looking for the little comments box.